Shaky Footage
If you ever thought about using your camera for shooting video and were disappointed by the amount of shaky footage while you are moving around, then a Glidecam might be a good solution. They have been around for over 10 years now and have helped budding film makers produce some really incredible footage. While you might get quicker results from a motorised gimbal, once you balance the Glidecam, it won’t let you down. There are no motors to fail or batteries to run out. A failed gimbal can ruin an entire shoot but a Glidecam simply can’t fail.
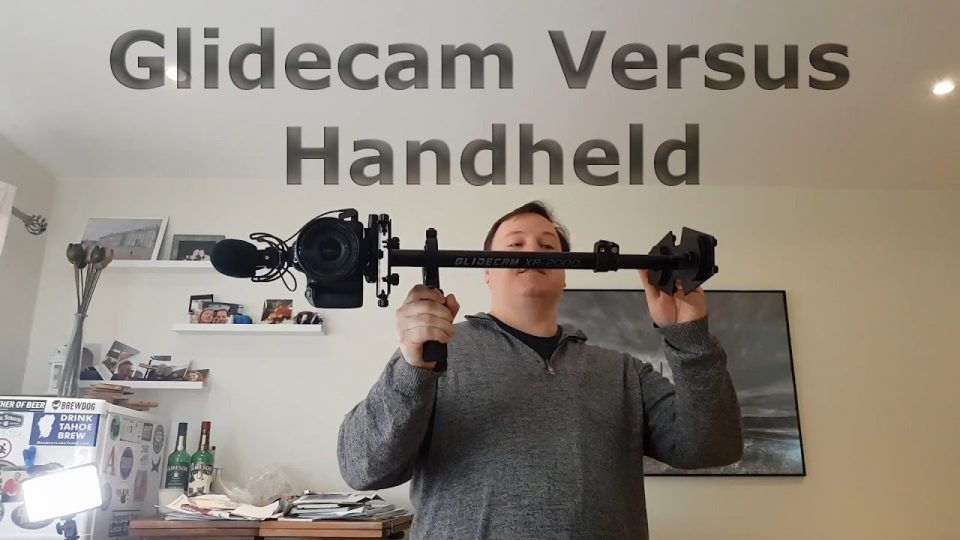
What Exactly is a Glidecam?
At it’s most basic, a Glidecam is essentially a weighted pole. The camera sits on a platform on top. There’s an extendable pole for adjusting balance and then weights at the bottom. You add/remove weights according to the weight of the camera. You then have a handle which attaches to the pole on a ball bearing ring so the pole can swivel around. It’s the same kind of ball bearing ring used in wheels and fidget spinners.
While a Glidecam is designed for static video cameras and DSLRs where you screw the camera on to the top plate, many people prefer a quicker approach so they can quickly take the camera off and attach to something else like a tripod or just shoot photos in between video. With that in mind, a lot of people screw in a tripod head. The mount of choice is a Manfrotto 577 which is an adjustable sliding mount. The ability to adjust this plate allows for quicker balancing of the glidecam versus a more traditional, static tripod mount such as the Manfrotto 323 which is what my own Tripod uses. Using the 577, you just lift the lever and slide the camera backward and forward in minute adjustments of only about 1 mm at a time.
Does it Matter Which Model Glidecam I get?
The short answer to this question is no. I purchased a second hand Glidecam XR 2000. That particular model has been replaced by the Glidecam XR Pro. As far as I can tell, it’s exactly the same as mine other than the name used. If I were to guess, they kept one from the budget range and called it the XR Pro so as not to confuse with their HD range which is more expensive. For my Canon 77D, the XR model is more than good enough. Here’s a YouTube video I found that compares the XR 2000 that I have with a HD 2000. The primary difference is the adjustment plate at the top. On mine, it’s a more manual adjustment where you loosen the thumbscrews and push the plate. On the HD series, turning the wheels moves the plate which allows for quicker, more precise adjustments. On a budget, get the XR but if you plan on making a living and going professional, get the HD series. In fact, I recommend the Glidecam Devin Graham edition. Devin is a film maker who designed a more adjustable Glidecam which the company happily made for him and promptly released to the general public. Just take a look at the results on his YouTube channel which has over 4.8 million subscribers.
There are also cheaper brands out there on Amazon. They are probably very good too so don’t be put off by the price tag of a Glidecam. You can pick up a cheaper brand of handheld stabiliser on Amazon and I did consider buying one before I found the Glidecam for sale second hand. Even second hand, at €140 it was still more than twice the price of a cheaper brand on Amazon which can be picked up for either side of £50 sterling.
Is There a Trick to Balancing?
I’ve mentioned using the Manfrotto 577 mount, that saves a lot of time. The biggest killer when it comes to adjusting is the need to make an adjustment, lift it up, place it back down and adjust again. That can be a severe strain on your arm. I have a cheap set of Neewar studio lights so I simply attached the Glidecam to them. That way I can adjust in real time and see the result instantly. One piece of advice is to make sure your lens cap is off and the camera is switched on because even the act of flipping the camera switch to the on position can change the balance. Also, make sure to remove your camera strap. You can also buy a mount which clamps on to a table and allows you to do the same. A cheap microphone stand will also work in most cases.
There are two levels of balancing. The first is that the camera is level. This means either completely level to the horizon (most likely) or else permanently pointing up or down depending on the kind of shot you require. The other is the smoothness so if you put the pole in a horizontal position, it should take more than two seconds to fall back to a vertical position. If it’s any faster, it will result in shaky video. This video I found on YouTube is very simple and shows step by step how to balance the Glidecam XR Pro.
Take a look at this video I made about it as well as showing you side by side the difference between Glidecam footage and handheld.


Leave A Comment