This cat house was a rather large project, both in terms of time, effort and physical size. The project was as follows: I was moving my cats from Westmeath to Dublin. My house is sold, or at least pending sale completion. I sold it myself, without an agent which you can read about here. The difference is that the cats were coming from a single story detached house with garden to a 3rd floor apartment with balconies. Cats and balconies can be dangerous as they can easily fall.
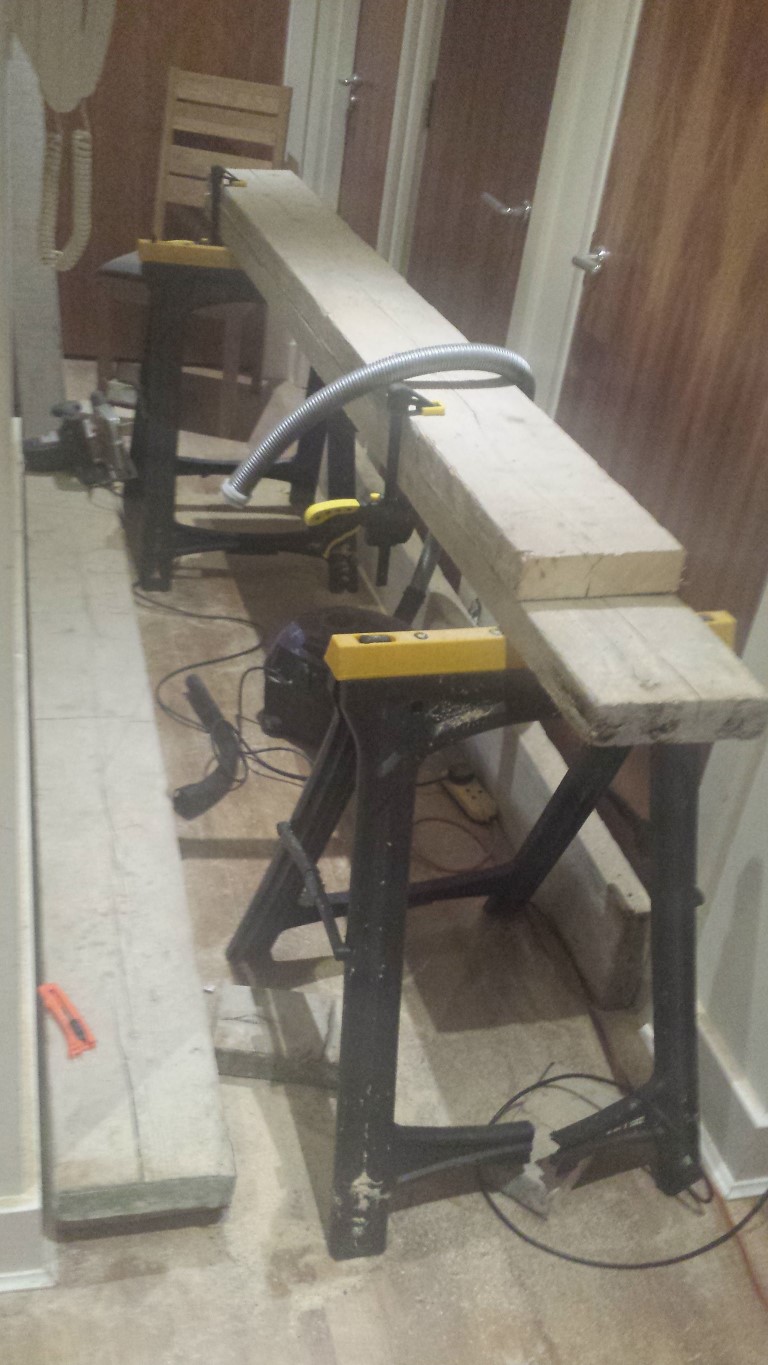
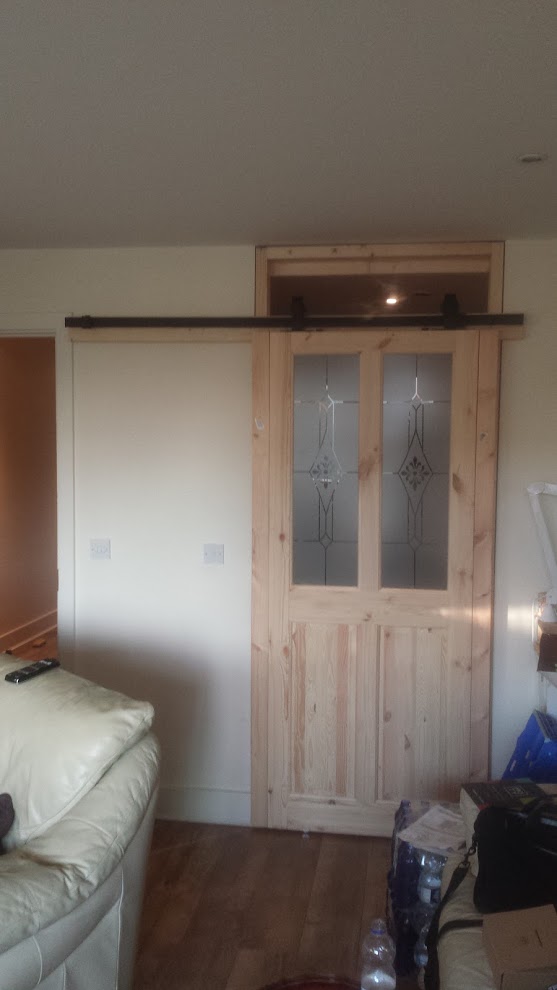
I started by picking up some old scaffold boards for €6 each from a scaffolding company. They were too old to be used in construction any more but would be fine for DIY stuff. My original idea was to use these for a sliding barn door in the apartment but they were far too thick for that. I’ll be writing about the sliding door soon so keep your eyes peeled as it’s an interesting one.
Scaffold boards are quite thick and wide. These were 241cm long, 22cm wide and 6cm thick. The first thing to do was to halve the width of some of my boards to 11cm which would double my number of boards. Thankfully, I had the tools for the job. I placed one board on my saw horses and then placed the boards I wanted to cut on top and used my circular saw to cut them.
My plan for these was to make a frame for the windows, yes the cat house would have two large double glazed windows! These were free, a friend from work had them to get rid of. With the frame cut to size, I used my router with a rabbet bit to cut along the boards. This would allow me to place the glass frame within the cut and keep it in place.

While there may have been a better way, my method of doing this was limited to the space of the balcony. I lay my frame out with the 4 vertical boards first and lay the glass panels into the grooves. I used a hammer to snugly tap the boards into place. I then placed the two cross beams across and drilled them in. I had some left over skirting board from my mancave build which I was sadly leaving behind in Westmeath (I took al the equipment of course). I simply cut 4 pieces and screwed them into the crossbeams to add extra security to the glass.
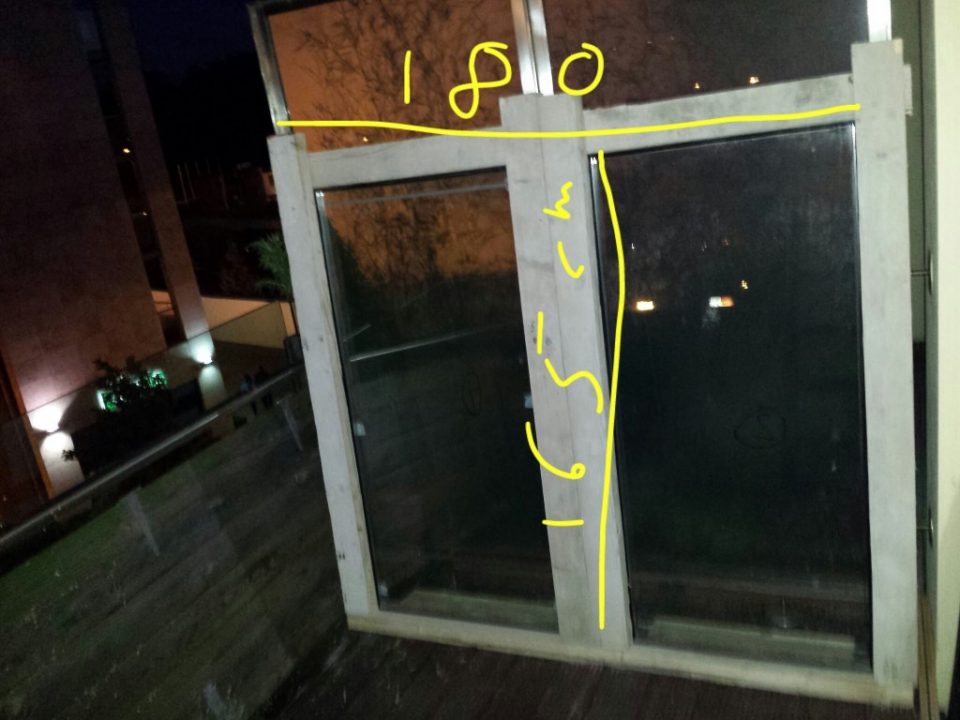
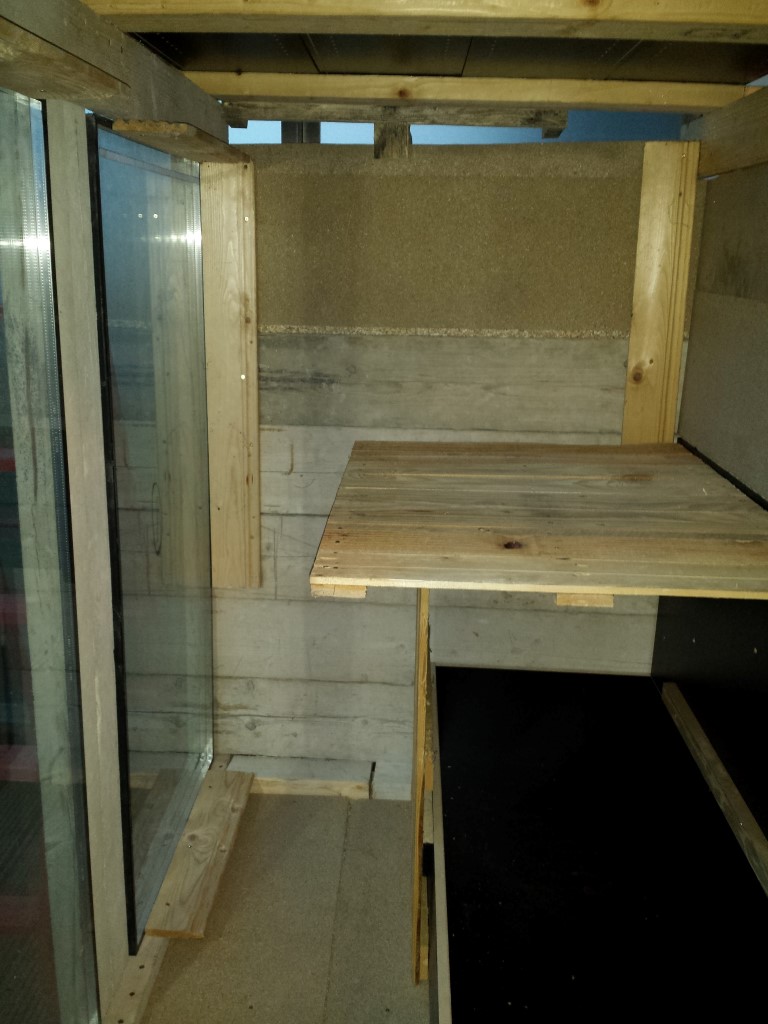
I then lifted it up and measured the end result so I would have an idea of what to do next. At 1.8m wide and 1.65m high, it was pretty damn big. I knew I would need more timber so I purchased a number of very long boards that were 125mm x 44mm and a whopping 4.8m long. I had to saw these in half just to be able to manoeuvre them up the stairwell, the lift wasn’t an option at this length without pre-measuring and extra cutting and since I was delivering them on my lunch break from work, I didn’t have that option.
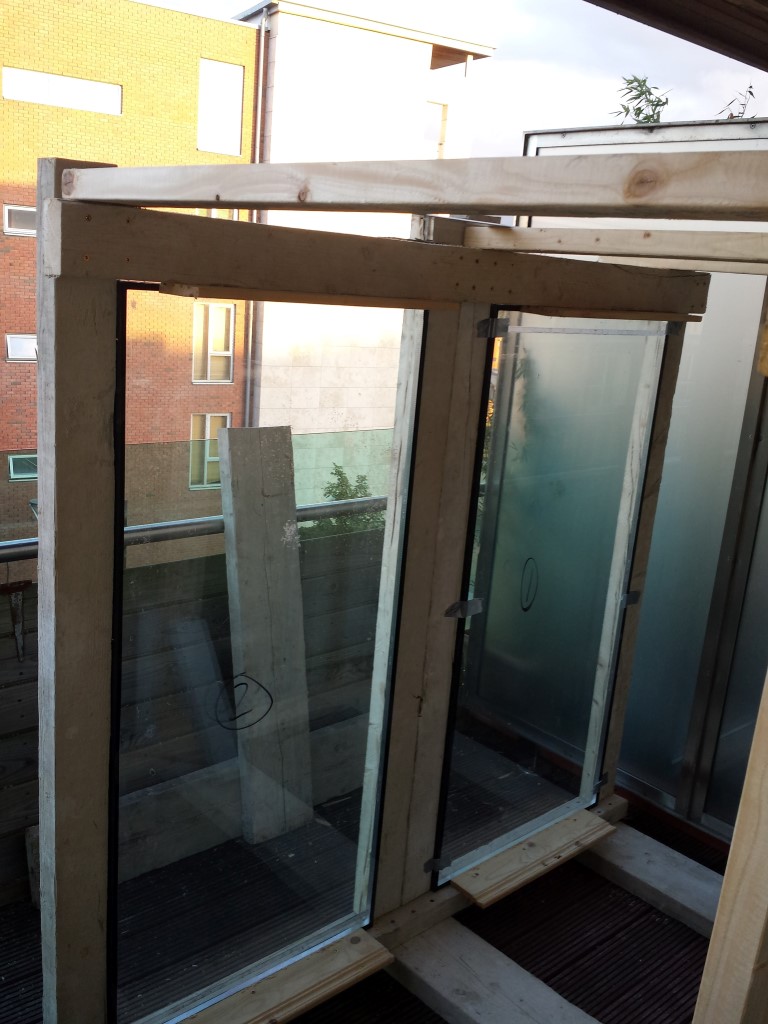
I cut up the rest of my scaffold boards into approximately 1.5m boards. I used three of these on the floor as part of the frame. I then used my new timber beams to frame each corner and with three crossbeams. I lacked the skills to ensure everything is fully square by myself so I went for a good enough approach which is fine as it’s a temporary building for cats! As long as it’s sturdy, it will be fine.
Of course, due to space, I ran into a problem. There was no way to move the frame in any meaningful way to put up anything on the far wall or the rear. What I did was use my scaffold boards and simply place them on the side wall (where the glass partition is between balconies). I just used long screws to screw into them from the front to help secure them. As long as I didn’t add to much pressure, they would be fine until I could secure them better.
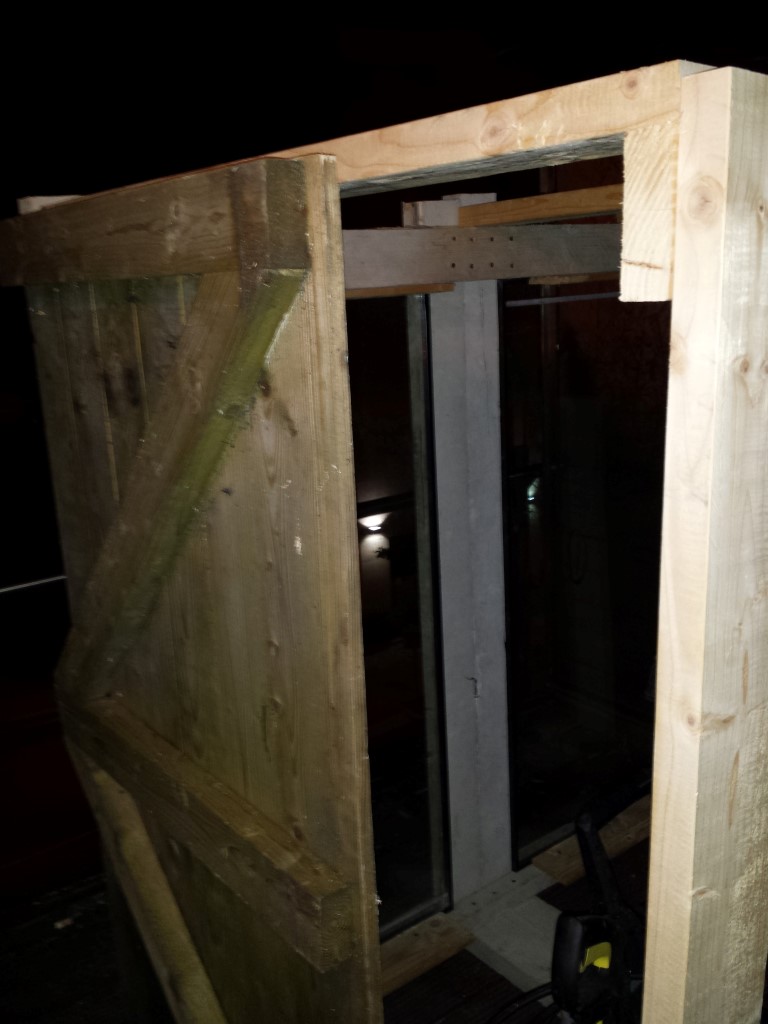
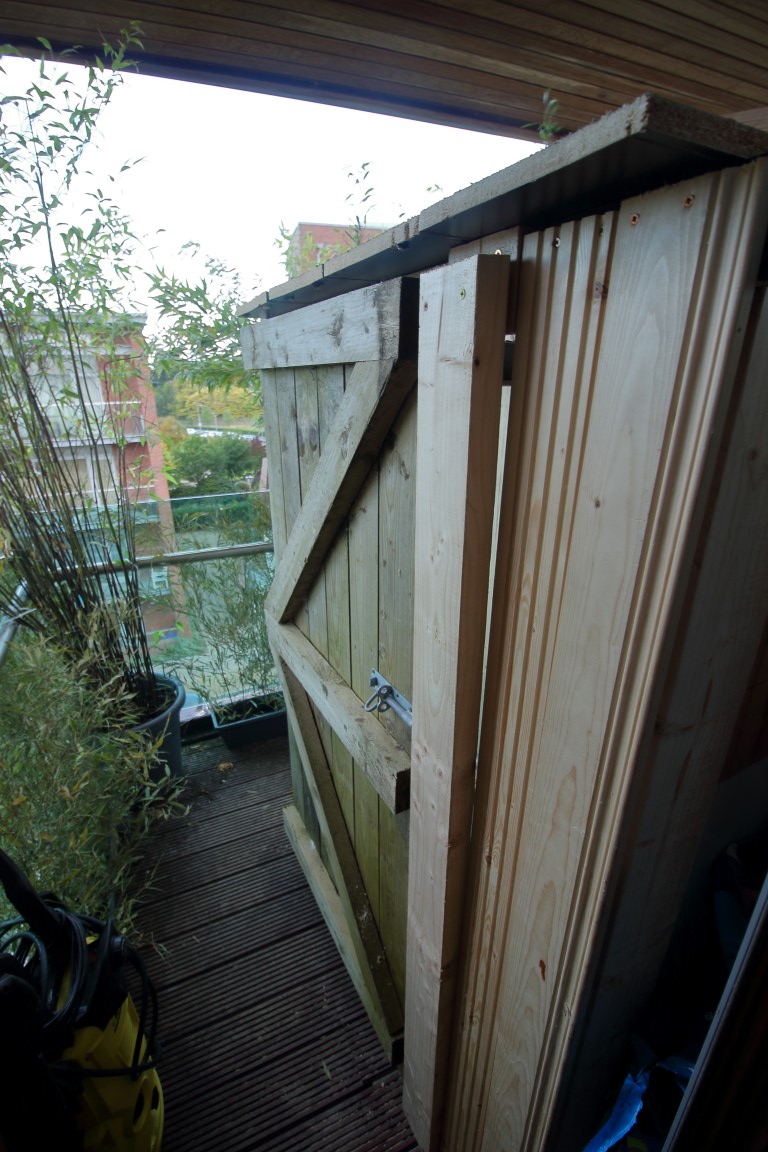
When I did my mancave, the concrete shed which I got installed first came with a wooden door. I replaced that wooden door with a normal house, PVC door and kept the wooden door just in case. The cat house gave me an excuse to use it so I moved it to Dublin with me. I added the door back to front with the support beams exposed because it closed better. All I had to do was remove the latch from the inside now and place it on the outside instead.
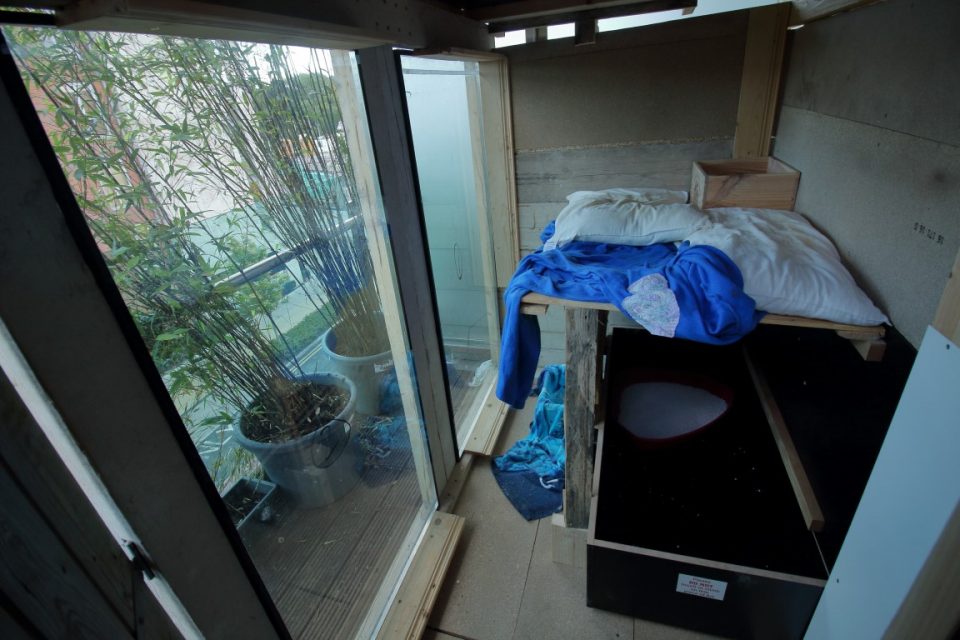
Now, living in an apartment complex can sometimes yield interesting things being thrown away in the refuse areas. People seem to leave all manner of useless items in the refuse area but not put them in the bins. Usually it’s absolute crap but sometimes it can be useful and I’d like to think that’s why they are breaking house rules by leaving that kind of stuff here. In my case, someone had left a broken up book case or display stand which was rather tall. These boards were perfect as a roof for the cat house. I simply screwed them on. Sure, there’s a minute gap but the roof is really just for shelter as the balcony itself is already covered. I can always add silicon filler or similar later to seal it all up. I also grabbed a few other timber boards along the way as well as a couple of pallets.
Since I was out of timber, I headed to woodies to see what I could find and what I found was a few packs of slightly damaged attic boards for half price. A pack of three was €5 so I bought two. These acted as the floor boards and to finish off the rear and far side wall. I also had a large wooden box or plinth which had been used to support a piece of artwork. We kept it as it was useful and now I had a use for it. This became a little compartment to keep the litter box, that way the cats can’t mess up the rest of the house with litter, only the litter box area. I used the lid as part of the rear wall. I cut up a small pallet and used that to make a wall on the other side of the litter area and to make a roof to act as a raised platform.

The cat house won’t win any aestheitic awards so I got a load of bamboo plants to help hide it and add some nice shelter for the cats. While they don’t like it all that much, I have locked them in a few times and they are getting used to it. Eventually they can have the whole balcony but I need to stick up some netting to prevent them getting on to the neighbours balcony or worse, falling off after getting too adventurous.
The inside is only functionally complete. I also plan on sticking up a full floor rather than just a raised platform. They might eventually love their little house but since they are indoor cats, I suspect they are always going to be more comfortable in the living room. Even in Westmeath, they only went out for 10 to 20 minutes before looking to come back in.
You can see how it looks now when I walk on to the balcony. The cat house door opens only as far as the bamboo. When the netting goes up, it will go up behind the bamboo so they will be unable to climb out onto the railing and plummet to their deaths three stories below. It will also prevent them from getting on the the neighbour’s balcony next door. Since I took these pictures the other day, I have put in an irrigation system using this hozelock pack. It feeds into all of the pots. Since there’s no running water on the balcony, I will hook that up to a water container I bought which will sit on the roof of the cat house. There should be enough gravity pressure to work, fingers crossed.
Leave A Comment